Configurations
The Configuration settings page allows complete management of configurations in the workspace. All workspace configurations appear in a list on the left side of the page. When a configuration is selected from the list, all details for that configuration are displayed in the main section (on the right).
Every job executed in Companion must have an assigned configuration that describes which pipeline is executed and defines the parameters for all tasks in that pipeline.
When using the XLIFF Pipeline Format (used for MT pipelines), a list of supported language pairs also must be defined in the configuration. In this case, each job must include a definition of the language pair, including the source (‘From’) and target (‘To’) languages from this list.
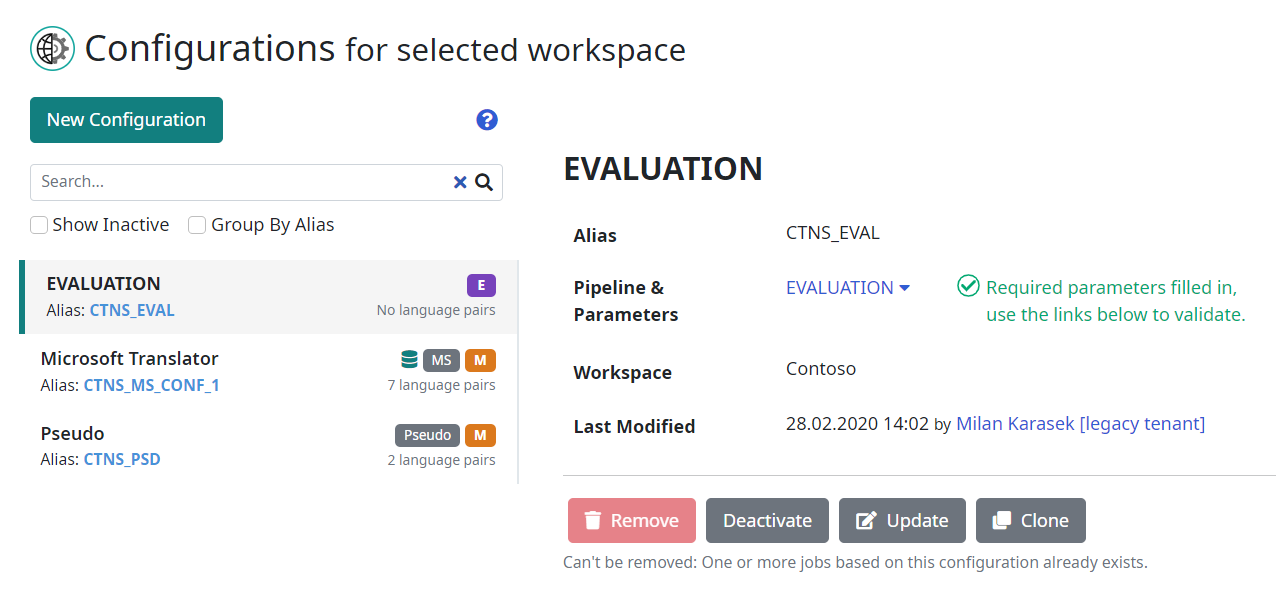
To better navigate and find available workspace configurations, you can use the live filter above the list of configurations on the left side of the page. You can also choose to show or hide inactive configurations and group the list by configuration alias.
When a configuration is selected, the main section displays the name and description of the configuration, as well as the configuration Alias, Pipeline & Parameters and a list of Language Pairs.
A new configuration can be created using the New Configuration button located above the list. See the Configuration Creation section for more information.
Existing configurations can be:
Updated: Using the Update button, you can modify the general metadata of the configuration, like Name, Alias, Description and Pipeline.
Removed: Using the Remove button, you can remove the selected configuration. Note that the configuration CANNOT be removed if there are any jobs executed using this configuration. In such cases, it is recommended to rename the associated alias and mark it as inactive.
Marked as inactive: Using the Deactivate button, you can mark the selected configuration as inactive. In case there are some jobs executed with this configuration, it cannot be removed. To hide the configuration from the list, mark it as inactive. Once deactivated, inactive configurations are no longer available when creating new jobs.
Cloned: Using the Clone button, you can make a copy the configuration.
Pipeline & Parameters
In the Configuration settings page, the Pipeline & Parameters section is an expandable part of the page containing settings of all tasks used in the selected Pipeline. This part is displayed by clicking on the name of the pipeline.
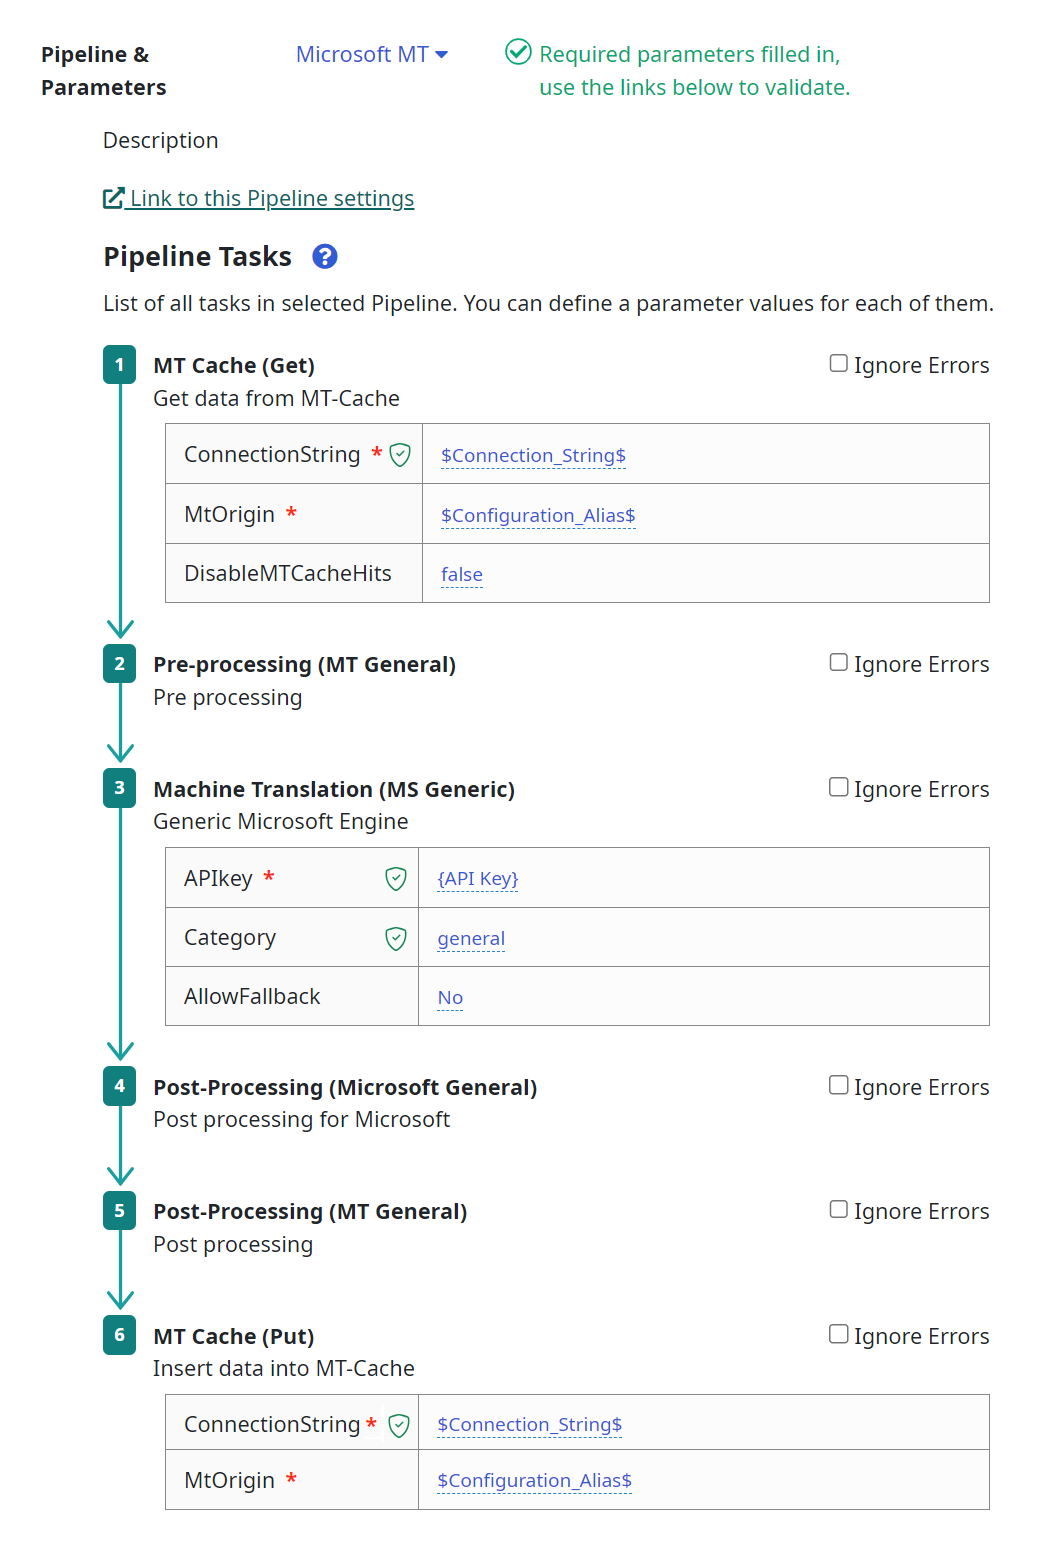
When expanded, the pipeline description, a link to the Pipeline settings section and a list of all Pipeline Tasks are shown.
Each Task displays its name, description and list of parameters, if there are any defined in the plugin (plugins are the executables behind the tasks, see Tasks vs. Plugins section in Companion Fundamentals).
In order for a configuration to be valid and usable, all required parameters must be defined. A simple validation is implemented to check if all such parameters are filled in. In case some required parameters are missing, a notification is displayed next to the pipeline name and the Pipeline & Parameters section of the page is automatically expanded.
You can change the value of a parameter by clicking on the value in the parameter table (in case there is no value, ‘Empty’ string appears instead). The value is then displayed in an editable text box. When finished editing, just click on the green check mark button to save.
The value of the parameter can be free text, a Workspace Parameters (defined in the Workspaces settings) or a System parameter:
Free text is entered normally, as you write, like ‘Any value’.
Workspace parameter is enclosed in curly brackets, like ‘{API key}’.
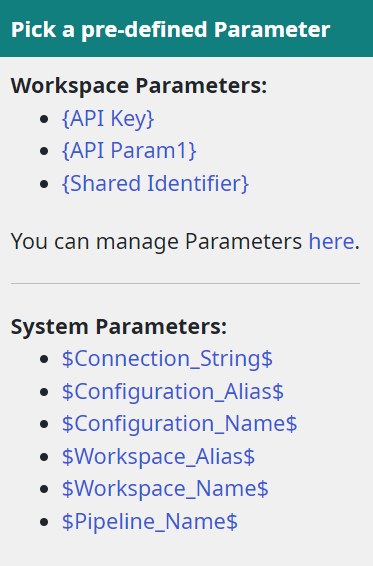
System parameter is enclosed in dollar signs, e.g., ‘$Connection_String$’. This is a special type of parameter that works across all workspaces within Companion. The following system parameters have been defined:
$Connection_String$ - Companion Database connection string (used mainly as a default value for the MT Cache plugin to connect the database).
$Configuration_Alias$ - Content of this parameter always contains the alias of the Configuration in which the task is executed.
Tip: To simplify filling in parameters, the parameter picker pops up when editing the parameter. This picker contains a list of all defined workspace and system parameters and when clicked, the parameter is copied to the text field:
The Ignore Error checkbox appears on each task in the list. When ticked, it enables the pipeline to continue execution if an error is encountered during run time. By default, the checkbox is switched off and any error in any task will stop the execution of a job. When checked, the job tries to execute subsequent tasks even if an error occurs.
Be careful with this feature. It should be used mainly when debugging your configuration and otherwise should be switched off.
Language pairs
For the XLIFF Pipeline format (used for MT pipelines ), a list of supported language pairs also must be defined in the configuration. In this case, each job must include a definition of the language pair, including the source (‘From’) and target (‘To’) languages from this list. Otherwise, an error is thrown when a job is executed using the pipeline.
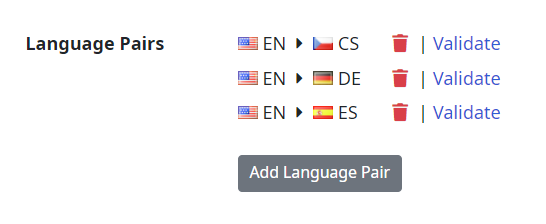
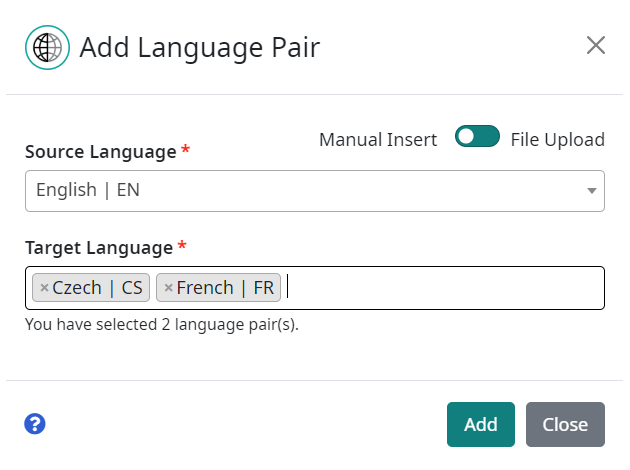
You can add a new language pair with the Add Language Pair button. When clicked, a dialog box is displayed allowing you to select one Source Language and one (or more) Target Languages:
You can remove a language pair by clicking on the bin next to each pair.
You are also able to validate the functionality of configuration for each language pair. By clicking on the Validate button, a modal is shown. If source language is English, an input string (‘Hello world!’) is automatically filled. By clicking on the Validate button inside the modal, a new job is executed, sending an input string to the configured engine for translation. The result of validation is displayed in the modal and next to the Validate button if you close the modal.
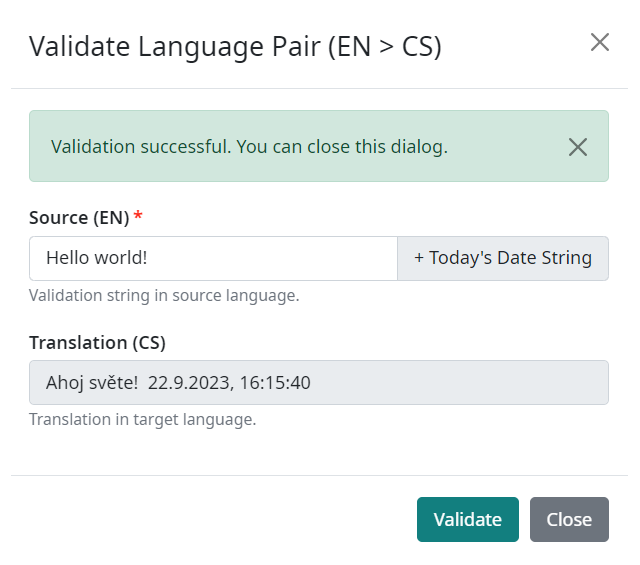

When an error occurs during validation, you can see the detail immediately in the modal or just by hovering the mouse pointer over the icon next to the button.