Segmentation
The Segmentation step is part of paragraph-based job types (such as QAP and CAP). It takes the input data — source, translation, and translation 2 (in case of CAP job type) — and presents them paragraph by paragraph. For each paragraph, the evaluator defines segments by selecting portions of text and aligning them across columns.
Each paragraph is automatically pre-segmented, so in many cases the evaluator only needs to verify that the segmentation is correct and make adjustments where necessary.
Paragraph View
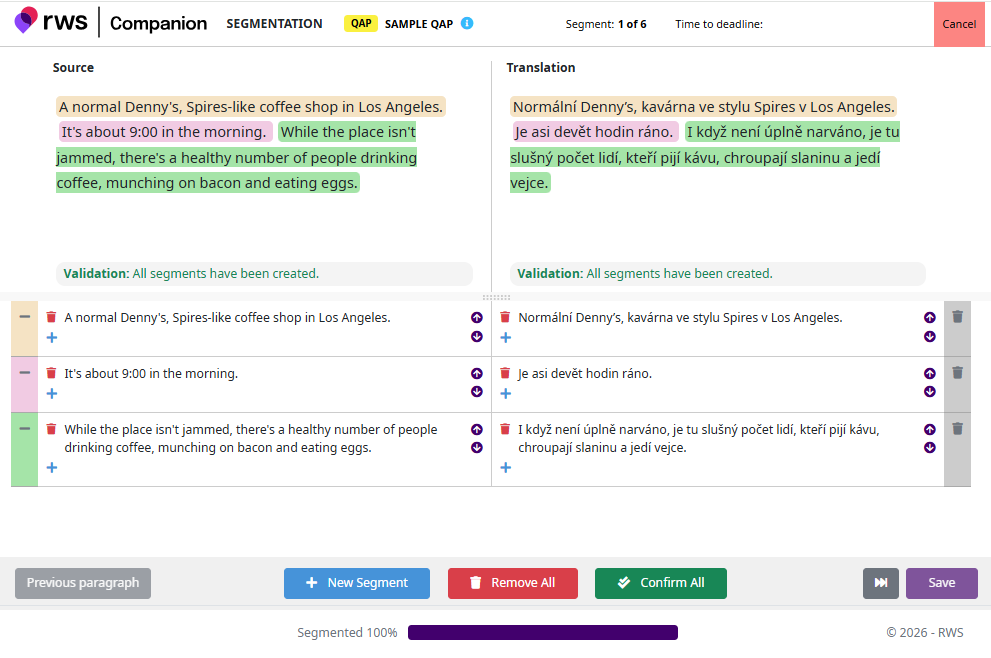
The top part of the screen displays the current paragraph for each column — Source and Translation (and Translation 2 for CAP jobs). The text in each column is color-coded to indicate which parts belong to which segments.
When selecting a chunk of text, the paragraph background changes to yellow, indicating that text selection mode is active. In this mode, the evaluator uses the mouse to select the portion of text that represents a segment or chunk.
Use the Previous paragraph and Next paragraph buttons at the bottom of the page to navigate through the content.
Alignment Section
Below the paragraph view, the alignment section displays the defined segments in a table-like layout. Each row represents a segment, with columns corresponding to source and translation(s).
The alignment section allows the evaluator to:
Reorder segments — use the arrow buttons in each column to move source and translation content independently, ensuring that the corresponding source and translation segments are properly aligned.
Add a new segment — click the + New Segment button at the bottom of the page to create a new empty segment row in the alignment section.
Remove a segment — click the bin icon on the very right column of the alignment section to remove the entire segment row.
Remove all segments — click the Remove All button at the bottom of the page to clear all segments at once.
Chunks
A segment can consist of one or more chunks of text. This means a segment does not have to be a single continuous piece of text — it can begin at the start of a paragraph and continue in the middle, skipping over parts that belong to other segments.
To add a new chunk to a segment, click the small + button in the corresponding row of the alignment section. The paragraph background will turn yellow, allowing the evaluator to select additional text to be included in the segment.
To remove a chunk, click the small bin icon next to the chunk.
Confirming and Saving
Before saving the segmentation data, all segments must be confirmed. An unconfirmed segment indicates that the evaluator has not yet verified its correctness.
To confirm a specific segment, click on the very left column in the alignment section for the selected segment.
To confirm all segments at once, click the Confirm All button at the bottom of the page.
Once all segments are confirmed, click the Save button to save the segmentation data and proceed to the next paragraph.